Workflows
2 minute read
Pryme AP Automation boasts a robust integration with Power Automate, offering a suite of customized document approval workflows. This integration is key to automating and streamlining the approval processes, adaptable to the unique requirements of each organization.
General Functionality of Customized Workflows
The application leverages Power Automate to create flexible and multi-layered workflows for document approval. These workflows are designed to handle a variety of scenarios and can be tailored according to the specific needs and policies of each organization. The functionality includes:
- Dynamic approval processes based on document attributes such as value, type, or project association.
- Customizable thresholds and conditions to match organizational approval hierarchies and protocols.
- Advanced automation capabilities to reduce manual intervention and speed up the approval cycle.
These workflows are underpinned by custom APIs developed for Pryme AP Automation, ensuring seamless integration and optimal performance.
Automatic API Installation
Upon installing Pryme AP Automation, these custom APIs are automatically set up in the background, eliminating the need for manual configuration. This allows users to immediately benefit from the advanced functionalities integrated into their Power Automate environment.
Importing Workflows into Power Automate
The Power Automate workflows, while crafted for Pryme AP Automation, require a simple import process:
- In Power Automate, go to the ‘My flows’ section.
- Select ‘Import’, and then choose the flow package provided with Pryme AP Automation.
- Follow the prompts to complete the import process.
Note
While the core workflows are pre-defined, they are fully customizable within Power Automate. This flexibility allows organizations to modify and adapt the workflows to align with their internal approval processes and compliance requirements.The integration of Power Automate with Pryme AP Automation marks a significant advancement in automating document approval processes, ensuring adaptability and efficiency in workflow management.
Enabling Rejected Status
To use the new Rejected status in Pryme AP Automation, enable the Pryme-specific workflows in Business Central. Follow these steps:
- Choose the 🔎 icon, enter Workflows, and select the related link.
- If any standard workflows are already set up, disable them to prevent conflicts.
- Click New Workflow from Template.
- In the filter, search for Pryme.
- Select the appropriate Pryme workflow for your needs (e.g., Sales, Purchase Invoice, or Credit Memos).
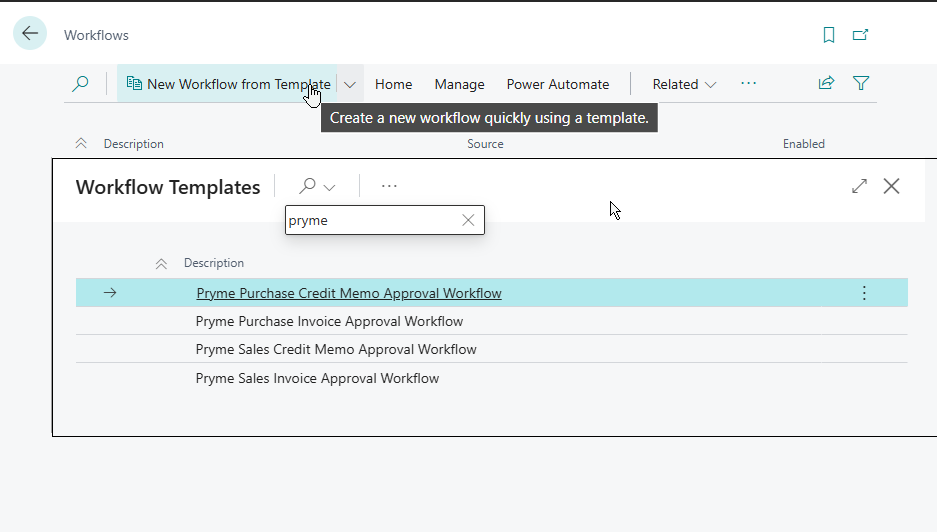
- Click OK to create the workflow.
- Open the workflow you created and enable it.
Once enabled, the Pryme AP Automation workflows will support the Rejected status.